DIY kinetic sand offers a fun and engaging sensory experience for kids and adults alike. This magical substance, with its unique texture and molding properties, can be created right at home using simple ingredients and a few basic tools. Unlike store-bought kinetic sand, homemade versions provide an opportunity to customize colors, textures, and even scents, making it a truly personalized experience.
From simple recipes to creative play ideas, this guide explores the world of DIY kinetic sand, providing everything you need to get started. We’ll delve into the benefits and drawbacks of homemade sand, discuss essential tools and equipment, and offer step-by-step instructions for crafting your own batch. We’ll also cover storage and preservation tips, safety considerations, and even explore the educational potential of this versatile material.
What is DIY Kinetic Sand?

DIY kinetic sand is a fun and engaging sensory activity that you can easily create at home. It mimics the texture and properties of store-bought kinetic sand, but with a few simple ingredients and a bit of effort.
Composition of DIY Kinetic Sand
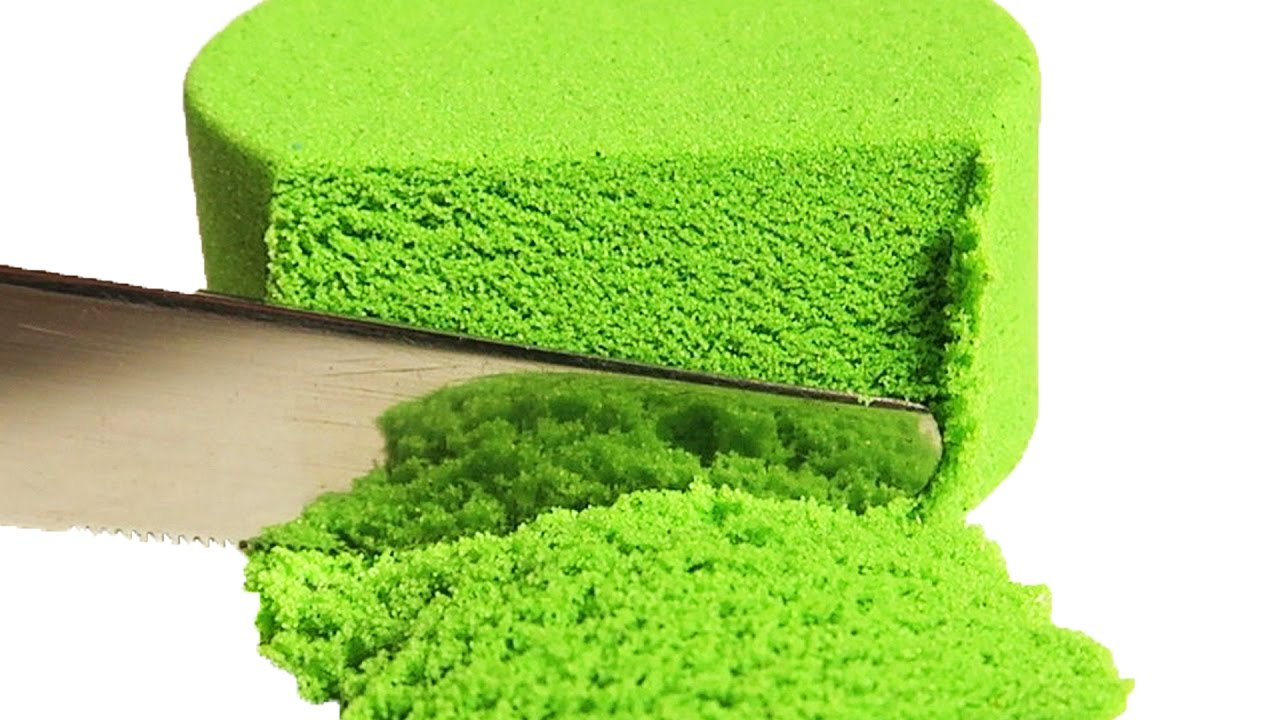
The basic composition of DIY kinetic sand typically involves a mixture of fine sand, a binding agent, and sometimes other additives. The most common binding agent is cornstarch, which gives the sand its unique texture and ability to mold.
The ratio of sand to cornstarch can vary depending on the desired consistency, but a typical starting point is 1:1.
Other additives, such as vegetable oil or baby oil, can be added to adjust the texture and make the sand smoother.
Benefits of Making DIY Kinetic Sand
Making DIY kinetic sand offers several advantages over purchasing it from a store.
- Cost-effective: Creating DIY kinetic sand is significantly cheaper than buying pre-made kinetic sand. You can make a large batch for a fraction of the price.
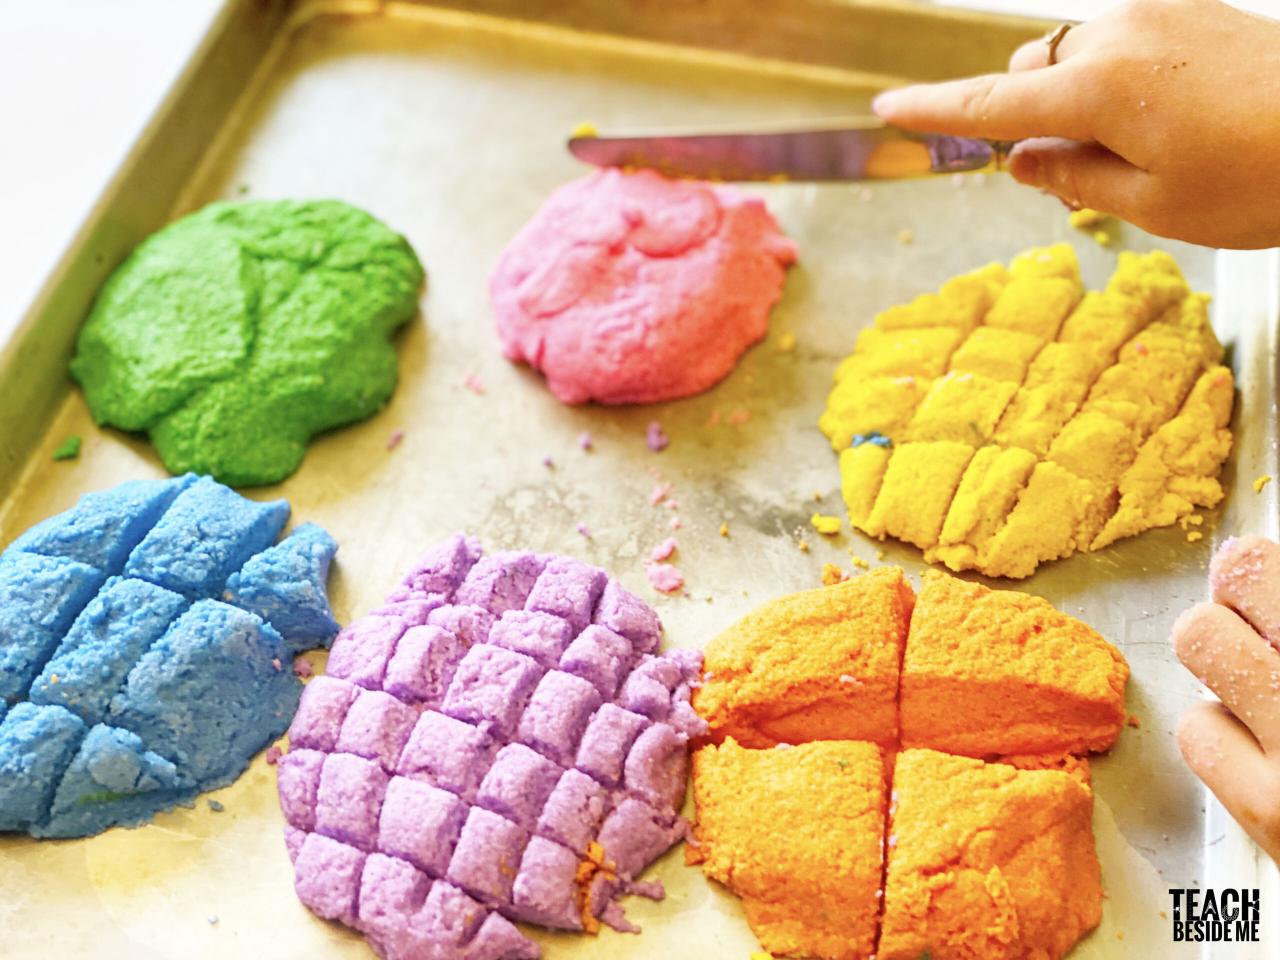
- Customization: DIY kinetic sand allows for greater customization. You can experiment with different types of sand, binding agents, and additives to create unique textures and colors.
- Educational: The process of making DIY kinetic sand can be a fun and educational experience for children, teaching them about different materials and their properties.
Drawbacks of Using DIY Kinetic Sand
While DIY kinetic sand offers several advantages, it also has some potential drawbacks.
- Shelf Life: DIY kinetic sand typically has a shorter shelf life compared to store-bought options. The cornstarch can absorb moisture and cause the sand to clump, making it unusable.
- Consistency: Achieving the desired consistency can be tricky, requiring some trial and error. The texture may not be as consistent as store-bought kinetic sand.
- Mess: Making DIY kinetic sand can be messy, as it involves handling sand and cornstarch. It’s important to take precautions to avoid spills and messes.
DIY Kinetic Sand Recipes
Creating your own kinetic sand is a fun and engaging activity that can be enjoyed by people of all ages. It allows for creative expression and sensory exploration. With a few simple ingredients, you can whip up batches of kinetic sand in various colors and textures, perfect for molding, sculpting, and endless imaginative play.
Simple Kinetic Sand Recipe
This recipe uses basic ingredients that are readily available in most households.
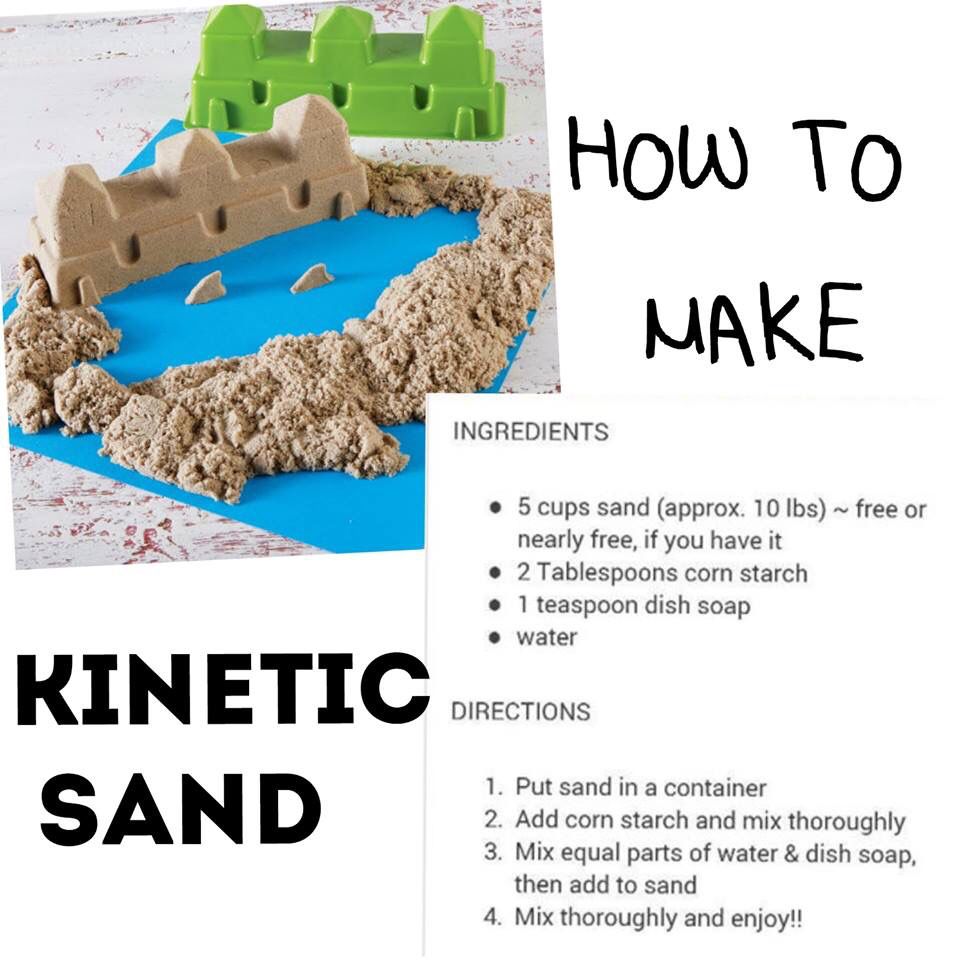
The basic formula is:
- 4 cups of fine play sand
- 1 cup of cornstarch
- 1/2 cup of water
To make the sand, combine the sand and cornstarch in a large bowl. Gradually add the water, mixing well after each addition, until the sand forms a cohesive, moldable texture. If the sand is too dry, add more water, a tablespoon at a time. If it is too wet, add more cornstarch.
DIY Kinetic Sand with Vibrant Colors
Adding color to kinetic sand is a simple way to enhance its visual appeal and create exciting play experiences.
You can use food coloring, liquid watercolors, or even powdered tempera paint to achieve the desired colors.
For vibrant colors, add a few drops of food coloring or a small amount of liquid watercolor to the water before mixing it with the sand and cornstarch. For a more intense color, add a little more coloring.
DIY Kinetic Sand with Unique Textures
To create kinetic sand with unique textures, you can experiment with different ingredients.
Adding ingredients like glitter, fine-grain sand, or even crushed dried leaves can alter the texture and visual appeal of the sand.
For a sparkly texture, add a generous amount of fine glitter to the sand mixture. For a rougher texture, incorporate a small amount of fine-grain sand. To create a more natural feel, add a small amount of crushed dried leaves.
Step-by-Step Guide
This section provides a comprehensive step-by-step guide for creating your own DIY kinetic sand. It Artikels the essential steps involved in mixing and kneading the ingredients, ensuring a successful and enjoyable experience.
Preparing the Ingredients
Before starting, gather all the necessary ingredients and tools. These include:
- Fine-grained play sand
- Cornstarch
- Water
- Optional: Food coloring, glitter, or other desired additives
- Mixing bowl
- Measuring cups and spoons
- Spatula or spoon for mixing
It’s important to use fine-grained play sand for the best results. This type of sand provides the desired texture and consistency for kinetic sand. Cornstarch acts as a binder, giving the sand its unique flow and moldability. Water is essential for activating the cornstarch and creating the desired consistency. Food coloring and glitter can be added to customize the color and appearance of the kinetic sand.
Mixing the Ingredients
Mixing the ingredients is a crucial step in creating kinetic sand. The correct proportions are essential for achieving the desired texture and consistency.
- Start by pouring the desired amount of play sand into a mixing bowl. The amount of sand will determine the final quantity of kinetic sand.
- Gradually add cornstarch to the sand, starting with a small amount and increasing as needed. The ratio of sand to cornstarch can vary depending on the desired consistency, but a general guideline is 1 cup of sand to 1/2 cup of cornstarch.
- Use a spatula or spoon to mix the sand and cornstarch thoroughly. Ensure that the cornstarch is evenly distributed throughout the sand.
- Slowly add water to the mixture, a little at a time, while continuing to mix. The amount of water needed will vary depending on the humidity and the type of sand used. Aim for a consistency that is slightly damp but not wet.
- Continue mixing until the sand and cornstarch are fully combined and the mixture forms a cohesive mass. The sand should be slightly damp and hold its shape when squeezed.
Kneading the Kinetic Sand
Kneading the kinetic sand is essential for developing its texture and consistency. This process helps to activate the cornstarch and ensure that the sand is smooth and moldable.
- Once the ingredients are fully mixed, transfer the kinetic sand to a clean surface, such as a countertop or a baking sheet.
- Knead the sand with your hands for several minutes. The kneading process helps to distribute the cornstarch evenly and create a smooth, consistent texture.
- As you knead, you may need to add a little more water or cornstarch, depending on the consistency. If the sand is too dry, add a small amount of water. If it’s too wet, add a little more cornstarch.
- Continue kneading until the kinetic sand reaches the desired texture. It should be firm enough to hold its shape but soft enough to mold easily.
Troubleshooting Common Issues
While creating DIY kinetic sand, some common issues may arise. Here are some troubleshooting tips to address these challenges:
- Sand is too dry: If the kinetic sand is too dry, it will be crumbly and difficult to mold. Add a small amount of water to the sand and knead it thoroughly.
- Sand is too wet: If the kinetic sand is too wet, it will be sticky and difficult to work with. Add a little more cornstarch to the sand and knead it thoroughly.
- Sand is not smooth: If the kinetic sand is not smooth, it may be due to uneven distribution of cornstarch. Knead the sand thoroughly to ensure that the cornstarch is evenly distributed.
Remember to adjust the amount of water and cornstarch as needed to achieve the desired consistency.
Storage and Preservation

Proper storage is essential to keep your DIY kinetic sand fresh and playable for a longer time. While homemade kinetic sand doesn’t have the same shelf life as store-bought versions, with careful handling and storage, you can extend its playability significantly.
Storage Methods
Storing your kinetic sand correctly helps maintain its texture and moisture levels.
- Airtight Containers: Use airtight containers, such as plastic tubs, glass jars, or resealable bags. This prevents the sand from drying out and becoming too crumbly.
- Moisture Control: For extra moisture retention, consider placing a damp paper towel or cloth inside the container along with the sand. This helps create a slightly humid environment, preventing the sand from drying out too quickly.
- Temperature: Store your kinetic sand in a cool, dry place. Avoid exposing it to direct sunlight or extreme temperatures, as these can affect its texture and moisture levels.
Preserving Texture and Moisture
- Moisture Levels: Keep an eye on the moisture level of your sand. If it starts to become too dry, you can add a few drops of water and mix it thoroughly. However, be careful not to add too much water, as this can make the sand too sticky and difficult to play with.
- Preventing Mold: Mold can be a concern, especially if the sand is stored in a humid environment. To prevent mold growth, ensure the sand is completely dry before storing it. If you notice any mold, discard the sand and start fresh.
Lifespan of DIY Kinetic Sand
The lifespan of DIY kinetic sand varies depending on several factors, including:
- Ingredients: The type of sand and the ratio of ingredients used can affect the durability of the sand. For example, using fine-grained sand may result in a more durable sand compared to coarse-grained sand.
- Storage Conditions: Proper storage is crucial for preserving the sand’s texture and moisture. Storing it in a cool, dry place and using airtight containers will help extend its lifespan.
- Play Time: Frequent use can also affect the lifespan of the sand. The more you play with it, the more likely it is to dry out and lose its texture.
DIY Kinetic Sand Variations

While the basic DIY kinetic sand recipe offers a fun and engaging sensory experience, there are many ways to customize it to create different textures and properties. Experimenting with additives and different ingredients allows you to create unique versions of kinetic sand tailored to specific interests and preferences.
Adding Additives
Adding various substances to the basic DIY kinetic sand recipe can alter its texture, color, and even scent. These additives can enhance the sensory experience and provide opportunities for creative play.
DIY kinetic sand is a fun and easy activity for kids of all ages. It’s a great way to encourage creativity and sensory play. If you’re looking for another fun outdoor activity, you can check out this DIY mud kitchen project.
Both DIY kinetic sand and a mud kitchen provide hours of imaginative play and learning opportunities, encouraging kids to explore their creativity and connect with nature.
- Glitter: Adding glitter to kinetic sand creates a shimmering and sparkly effect, making it even more visually appealing and exciting for children. It can also add a touch of magic and wonder to sensory play.
- Sand: Adding a small amount of real sand can enhance the texture of kinetic sand, giving it a more grainy and realistic feel. This is particularly useful if you want to create a beach-themed sensory experience.
- Food Coloring: Food coloring is a great way to add vibrant hues to kinetic sand. You can use different colors to create themed sensory play experiences, like a rainbow-colored sandcastle or a vibrant underwater scene.
- Essential Oils: Adding a few drops of essential oils can infuse kinetic sand with a pleasant aroma. Lavender or chamomile oil can create a calming and relaxing atmosphere, while citrus oils can add a refreshing and uplifting scent.
Examples of DIY Kinetic Sand Variations
Here are a few examples of DIY kinetic sand variations with unique colors and textures.
- Glow-in-the-Dark Kinetic Sand: Mix the basic kinetic sand recipe with glow-in-the-dark paint. This variation allows for imaginative play in dimly lit environments, creating a magical and mesmerizing experience. The glow-in-the-dark effect can be enhanced by exposing the sand to a strong light source before playing in a darkened room.
- Metallic Kinetic Sand: Add metallic paint or powder to the basic recipe to create a shimmering and reflective effect. This variation can be used to create unique and visually stunning creations. The metallic finish can also be combined with other additives like glitter or sand for added texture and visual appeal.
- Scented Kinetic Sand: Combine the basic recipe with a few drops of essential oils to create a fragrant sensory experience. Lavender oil can create a calming and relaxing atmosphere, while citrus oils can add a refreshing and uplifting scent. Scented kinetic sand can be used to create themed sensory play experiences, such as a calming spa or a refreshing beach day.
DIY Kinetic Sand for Educational Purposes
DIY kinetic sand is not just a fun sensory toy; it’s a versatile tool for learning and exploration. It provides a hands-on experience that engages children’s senses and encourages creativity, problem-solving, and scientific thinking.
Science Experiments with DIY Kinetic Sand
DIY kinetic sand is a great medium for conducting simple science experiments that teach children about basic scientific concepts.
- Density and Buoyancy: Observe how different objects sink or float in kinetic sand. This demonstrates the concept of density, where denser objects sink and less dense objects float.
- Mixing and Separating: Combine different colors of kinetic sand and then try to separate them. This illustrates the concepts of mixing and separating substances.
- Texture and Properties: Explore the different textures and properties of kinetic sand by adding different ingredients, such as water or oil. This introduces the concept of how different substances interact.
Sensory Activities with DIY Kinetic Sand
Kinetic sand provides a stimulating sensory experience that helps children develop fine motor skills, hand-eye coordination, and tactile exploration.
- Shape Creation: Encourage children to mold, shape, and create different objects with the sand. This enhances their fine motor skills and spatial awareness.
- Texture Exploration: Encourage children to feel the sand’s texture, its coolness, and its ability to mold. This stimulates their tactile senses and sensory awareness.
- Sand Play: Engage children in imaginative play with the sand. This fosters creativity and encourages them to use their imagination.
Benefits of DIY Kinetic Sand for Development
DIY kinetic sand offers numerous benefits for children’s development, promoting creativity, fine motor skills, and sensory exploration.
- Fine Motor Skills: Molding, shaping, and digging in the sand strengthens hand muscles, improves dexterity, and enhances fine motor skills.
- Creativity and Imagination: The tactile nature of kinetic sand allows children to express their creativity through building, sculpting, and imaginative play.
- Sensory Exploration: The unique texture and sensory qualities of kinetic sand stimulate children’s tactile senses and promote sensory exploration.
Conclusion
DIY kinetic sand provides a fantastic opportunity for creativity, sensory exploration, and even learning. With a few basic ingredients and some simple steps, you can create a fun and engaging activity for all ages. Whether you’re looking for a unique sensory experience, a fun craft project, or an educational tool, DIY kinetic sand offers endless possibilities for exploration and play.
