Craft ideas for beginners offer a fantastic gateway to unleashing your creativity and exploring a world of artistic possibilities. Whether you’re drawn to the tactile nature of paper crafts, the vibrant colors of painting, or the intricate patterns of knitting, there’s a craft out there waiting to be discovered. This guide provides a comprehensive overview of various crafts, from traditional techniques like woodworking and pottery to modern digital crafts, ensuring you find a perfect match for your interests and skill level.
Each craft is broken down into manageable steps, providing clear instructions and helpful tips to guide you through the process. You’ll learn about essential materials, tools, and techniques, enabling you to create beautiful and unique projects from the comfort of your own home. So, gather your supplies, embrace the creative journey, and discover the joy of crafting.
Painting and Drawing
Painting and drawing are excellent ways to express creativity and explore different mediums. Both disciplines offer a wide range of techniques and styles to experiment with, making them accessible to beginners and seasoned artists alike. Whether you’re interested in capturing the beauty of nature, expressing abstract emotions, or simply enjoying the process of creating, painting and drawing can be a rewarding and fulfilling hobby.
Basic Painting Techniques
Understanding the basics of painting techniques is essential for beginners. These techniques provide a foundation for exploring different styles and achieving desired effects. The most common painting techniques include watercolor, acrylic, and oil painting.
- Watercolor Painting: Watercolor is a transparent medium, allowing colors to blend and create soft, luminous effects. It’s known for its fluidity and the ability to create washes and gradients. Watercolors are typically applied with brushes, but sponges, toothbrushes, and even fingers can be used for unique effects.
- Acrylic Painting: Acrylic paints are fast-drying, opaque paints that can be used on various surfaces. They offer a vibrant color range and are versatile for different painting styles. Acrylics can be diluted with water to create washes or applied thickly for impasto effects.
- Oil Painting: Oil paints are known for their rich, vibrant colors and slow drying time, which allows for blending and layering. They offer a smooth and buttery texture, making them ideal for detailed work. Oil paints are traditionally applied with brushes, but palette knives and other tools can be used for unique textures and effects.
Choosing the Right Supplies
Selecting the right supplies is crucial for a positive painting experience. Here are some tips for beginners:
- Brushes: Brushes come in various shapes, sizes, and materials. For beginners, a set of round, flat, and fan brushes in different sizes is a good starting point. Experiment with different brush types to discover what works best for your style and desired effects.
- Paints: Choose paints that are suitable for your chosen technique. For watercolor, look for watercolors in tubes or pans. For acrylic painting, acrylic paints in tubes or jars are readily available. For oil painting, oil paints in tubes are a popular choice.
- Canvases: Canvases come in various sizes and textures. For beginners, stretched canvases or canvas boards are good options. Choose a size that is comfortable to work with and provides enough space for your project.
Simple Painting Project for Beginners
A simple painting project for beginners could be a still life of fruits or flowers. This project allows you to practice basic painting techniques, color mixing, and composition.
- Subject Matter: Choose a few fruits or flowers that you find visually appealing. A bowl of apples, a vase of roses, or a simple arrangement of wildflowers can make for an excellent still life.
- Color Palette: Start with a limited color palette of 3-4 colors. For example, you could use red, yellow, blue, and green to create a variety of shades and hues.
- Composition: Arrange your subject matter in a visually pleasing way. Consider the balance, contrast, and focal point of your composition.
Sewing and Quilting
Sewing and quilting are crafts that offer a rewarding experience, allowing you to create unique and functional items. Whether you’re interested in making simple projects or more intricate designs, these crafts provide an outlet for creativity and personal expression.
Basic Sewing Techniques
Learning the fundamentals of sewing is essential for any beginner. Mastering these techniques will allow you to create a wide range of projects with confidence.
Threading a Needle
Threading a needle is the first step in sewing. It involves passing the thread through the eye of the needle.
- Hold the needle in your dominant hand, with the eye facing upwards.
- Thread the needle by passing the thread through the eye from the bottom to the top.
- Pull the thread through the eye until it is about an inch long.
Stitching
Stitching is the process of joining fabric together using a needle and thread.
- Start by knotting the end of the thread.
- Insert the needle through the fabric from the bottom to the top.
- Pull the thread through the fabric, leaving a small loop.
- Repeat steps 2 and 3, making sure each stitch is the same length.
- Continue stitching until you reach the desired length.
- End by knotting the thread to secure the stitches.
Using a Sewing Machine
A sewing machine can greatly speed up the sewing process.
- Thread the machine according to the manufacturer’s instructions.
- Place the fabric under the presser foot.
- Lower the presser foot and begin sewing.
- Use the foot pedal to control the speed of the machine.
- Stop sewing when you reach the desired length.
- Lift the presser foot and remove the fabric.
Simple Sewing Projects
Once you’ve mastered the basics, you can start making simple sewing projects.
Tote Bags
Tote bags are a versatile and practical sewing project.
- Choose a sturdy fabric, such as canvas or cotton.
- Cut two rectangular pieces of fabric for the bag’s sides.
- Sew the sides together, leaving the top open.
- Cut two strips of fabric for the handles.
- Sew the handles to the top of the bag.
Pillowcases
Pillowcases are a simple and beginner-friendly sewing project.
- Choose a soft fabric, such as cotton or linen.
- Cut two rectangular pieces of fabric for the pillowcase.
- Sew the sides together, leaving the opening at the top.
- Fold the top edge of the pillowcase over and sew it down.
Clothing
Sewing simple clothing items, such as skirts or dresses, can be a rewarding experience.
- Choose a comfortable and easy-to-work-with fabric.
- Find a pattern that matches your desired style and size.
- Cut out the fabric pieces according to the pattern instructions.
- Sew the pieces together following the pattern instructions.
Quilting Techniques
Quilting involves layering fabric, batting, and backing to create a warm and cozy blanket.
Choosing Fabrics
Selecting the right fabrics is crucial for quilting.
- Consider the weight and texture of the fabric.
- Choose fabrics that are compatible with each other in terms of color, pattern, and style.
- Choose fabrics that are pre-washed to prevent shrinkage.
Choosing Patterns
Quilting patterns provide a guide for stitching the fabric layers together.
- Choose a pattern that matches your skill level and interests.
- Consider the size and complexity of the pattern.
- Choose a pattern that complements the fabrics you’ve selected.
Materials
In addition to fabrics, you’ll need other materials for quilting.
- Batting: A layer of fluffy material that provides warmth and insulation.
- Backing: A sturdy fabric that forms the back of the quilt.
- Thread: A strong thread that is suitable for quilting.
- Quilting needles: Special needles designed for quilting.
- Quilting pins: Pins used to hold the layers together.
- Rotary cutter: A tool used to cut fabric quickly and accurately.
- Cutting mat: A mat that protects your work surface from the rotary cutter.
- Sewing machine: A sewing machine with a quilting foot.
Candle Making
Candle making is a fun and rewarding craft that allows you to create personalized and unique gifts or home décor. It involves melting wax, adding fragrance, and pouring the mixture into molds to create candles of various shapes and sizes. This process requires basic materials and tools, making it an accessible craft for beginners.
Choosing the Right Wax
Choosing the right wax is crucial for candle making, as it affects the candle’s burn quality, scent throw, and overall appearance.
- Soy wax is a popular choice for beginners due to its natural origin, clean burning, and ability to hold fragrance well. It has a slightly softer texture and a longer burn time compared to paraffin wax.
- Paraffin wax is a petroleum-based wax that is readily available and affordable. It has a harder texture and a shorter burn time than soy wax. However, it can release harmful chemicals when burned.
- Beeswax is a natural wax that produces a clean and bright flame. It has a honey-like scent and a longer burn time. However, it can be more expensive than other waxes.
Choosing the Right Wicks
The wick plays a vital role in the candle’s performance. It determines the flame size, burn time, and how well the candle melts.
- Cotton wicks are the most common type of wick used in candle making. They are available in various sizes and are suitable for most waxes.
- Wooden wicks are becoming increasingly popular due to their unique crackling sound when burning. They are typically used with soy wax and require a slightly larger wick size than cotton wicks.
Choosing the Right Fragrances
Fragrances are essential for creating scented candles. They add a pleasant aroma to the candle and enhance the overall experience.
- Essential oils are natural oils extracted from plants that offer therapeutic benefits. They are often used in aromatherapy candles.
- Fragrance oils are synthetic oils designed specifically for candle making. They offer a wide range of scents and are generally more affordable than essential oils.
Step-by-Step Guide to Making Scented Candles
- Gather your materials. This includes wax, wicks, fragrance oil, a double boiler or heat-safe pot and bowl, a thermometer, a pouring pitcher, a mold, and a stirring tool.
- Prepare your mold. Clean and dry your mold thoroughly. Secure the wick to the bottom of the mold using a wick sticker or a wick bar.
- Melt the wax. Place the wax in the double boiler or heat-safe pot and bowl. Heat the wax slowly over low heat, stirring occasionally, until it is completely melted. Use a thermometer to monitor the temperature. For soy wax, the ideal melting temperature is around 180°F (82°C).
- Add the fragrance oil. Once the wax is melted, remove it from the heat source and let it cool slightly. Add the fragrance oil to the wax, following the recommended fragrance load for your chosen wax and fragrance. Stir well to ensure the fragrance is evenly distributed.
- Pour the candle. Carefully pour the scented wax into the prepared mold. Avoid pouring too quickly to prevent air bubbles from forming. Let the candle cool and harden completely. This can take several hours, depending on the size of the candle and the type of wax used.
- Trim the wick. Once the candle has hardened, trim the wick to about ¼ inch. This will ensure a clean and even burn.
Soap Making: Craft Ideas For Beginners
Soap making is a fun and rewarding craft that allows you to create personalized and unique soaps. It involves a chemical reaction called saponification, where fats or oils are combined with a strong alkali, typically lye, to produce soap.
Safety Precautions
Soap making involves working with lye, a corrosive substance that can cause severe burns if it comes into contact with skin or eyes. It’s crucial to take the necessary safety precautions:
- Always wear safety goggles and gloves when handling lye.
- Work in a well-ventilated area, as the reaction produces fumes.
- Keep lye and other chemicals out of reach of children and pets.
- Store lye in a tightly sealed container and label it clearly.
Equipment, Craft ideas for beginners
To make soap, you will need the following equipment:
- Heat-resistant container: For melting oils and mixing ingredients. A stainless steel pot or a glass Pyrex measuring cup works well.
- Measuring cups and spoons: For accurately measuring ingredients.
- Digital scale: For precisely measuring lye and oils.
- Silicone molds: For shaping the soap.
- Stirring utensil: A wooden spoon or spatula for mixing ingredients.
- Thermometer: For monitoring the temperature of the oils and lye solution.
- Safety gear: Gloves, goggles, and a respirator for protection.
Making a Simple Batch of Soap
Here is a basic recipe for making soap from scratch:
- Ingredients:
- 20 oz (560 g) olive oil
- 6 oz (170 g) coconut oil
- 3.2 oz (90 g) lye (sodium hydroxide)
- 10 oz (280 ml) distilled water
- Optional: essential oils or fragrance oils
- Instructions:
- Prepare the lye solution: Carefully add the lye to the distilled water in a heat-resistant container. The solution will heat up and release fumes. Allow it to cool to room temperature.
- Melt the oils: In a separate container, melt the olive oil and coconut oil over low heat. Ensure the oils are completely melted and the temperature is around 120°F (49°C).
- Combine the lye solution and oils: Slowly pour the lye solution into the melted oils, stirring continuously. Continue stirring until the mixture reaches a trace, which is when the batter leaves a visible trail on the surface.
- Add fragrance: If desired, add essential oils or fragrance oils at the trace stage. Stir well to incorporate them.
- Pour the soap into molds: Pour the soap batter into the prepared silicone molds.
- Cure the soap: Cover the molds and let the soap cure for 4-6 weeks in a cool, dry place. During this time, the soap will harden and become usable.
Note: This recipe is a starting point. You can experiment with different oils, fragrances, and additives to create your own unique soap creations.
Pottery and Ceramics
Pottery and ceramics are fascinating crafts that involve shaping clay into various forms and then firing them in a kiln to create durable, artistic objects. This craft offers a unique blend of creativity, technical skill, and patience, making it an engaging and rewarding experience. Whether you’re interested in creating functional pieces like mugs or bowls or exploring more artistic expressions, pottery and ceramics provide a vast canvas for your imagination.
Basic Pottery Techniques
There are several basic techniques used in pottery, each offering a unique approach to shaping clay.
- Hand-building involves using your hands to directly shape the clay. This technique is ideal for beginners as it requires no specialized tools and allows for free-form creations. Common hand-building techniques include:
- Pinch Pot: This technique involves pinching and shaping a ball of clay into a vessel.
- Coil Building: This technique involves rolling out coils of clay and joining them together to create a form.
- Slab Building: This technique involves creating flat slabs of clay and joining them to form a vessel.
- Wheel Throwing is a technique that involves using a potter’s wheel to spin the clay while shaping it. This method allows for more precise and symmetrical forms, ideal for creating bowls, plates, and mugs. Wheel throwing requires practice and coordination to master, but it offers a unique way to interact with clay.
- Glazing is the final step in pottery, where a liquid glaze is applied to the surface of the fired clay. Glazes add color, texture, and a protective layer to the piece. There are various types of glazes, each with its unique properties and firing temperature. Applying glazes involves careful techniques to achieve the desired effect.
Materials and Tools
- Clay: Clay is the fundamental material in pottery. There are different types of clay, each with its unique properties, such as plasticity, shrinkage rate, and firing temperature. Common types of clay used in pottery include:
- Earthenware: This type of clay is porous and fires at a relatively low temperature. It is often used for decorative pieces and functional items.
- Stoneware: This type of clay is more durable and fires at a higher temperature. It is often used for tableware and other functional items.
- Porcelain: This type of clay is highly refined and fires at the highest temperature. It is known for its translucency and durability.
- Glazes: Glazes are liquid coatings applied to the surface of clay before firing. They provide color, texture, and a protective layer to the piece. Glazes are typically made from powdered minerals and other materials, which are mixed with water to form a slurry.
- Kiln: A kiln is a specialized oven used to fire clay and glaze. Kilns are designed to reach high temperatures, typically between 1,000°C and 1,600°C (1,832°F to 2,912°F). The firing process transforms the clay into a durable, ceramic material.
- Other Tools: In addition to clay, glazes, and a kiln, potters use various tools to shape, trim, and decorate their pieces. These tools include:
- Pottery Wheel: A rotating platform used for shaping clay.
- Ribs: Curved tools used for smoothing and shaping clay.
- Wire Cutters: Used for cutting clay into desired shapes.
- Sponges: Used for smoothing and cleaning clay.
- Modeling Tools: Used for creating details and textures on clay.
- Glaze Brushes: Used for applying glaze to clay.
- Kiln Shelves: Used to support pottery during firing.
Simple Pottery Project: Mug
A mug is a great beginner pottery project. It is relatively simple to create and allows you to practice hand-building techniques or wheel throwing. Here’s a step-by-step guide:
- Gather your materials: You will need a lump of clay, a pottery wheel (optional), a rolling pin (for hand-building), and a wire cutter.
- Shape the mug: If you’re using the wheel, center the clay on the wheel and shape it into a cylinder. If you’re hand-building, roll out a coil of clay and shape it into a cylinder. Once you have a cylinder, pinch the top to create the lip of the mug. Use your fingers to gently curve the sides of the mug to create the desired shape.
- Add a handle: For the handle, you can roll out a coil of clay and shape it into a loop. Attach the handle to the mug by scoring the surface of the mug and the handle with a tool and then applying slip (a watery clay mixture) to help them bond.
- Trim the mug: Once the mug is shaped, you can use a trimming tool to smooth the base and remove any excess clay. This will ensure that the mug sits evenly on a surface.
- Let the mug dry: Allow the mug to air dry completely before firing it in the kiln.
- Fire the mug: Fire the mug in a kiln according to the clay’s firing temperature.
- Glaze the mug: Once the mug is fired, you can apply a glaze to the surface. Choose a glaze that is compatible with the clay and firing temperature. Apply the glaze evenly and let it dry completely before firing it again.
Last Recap
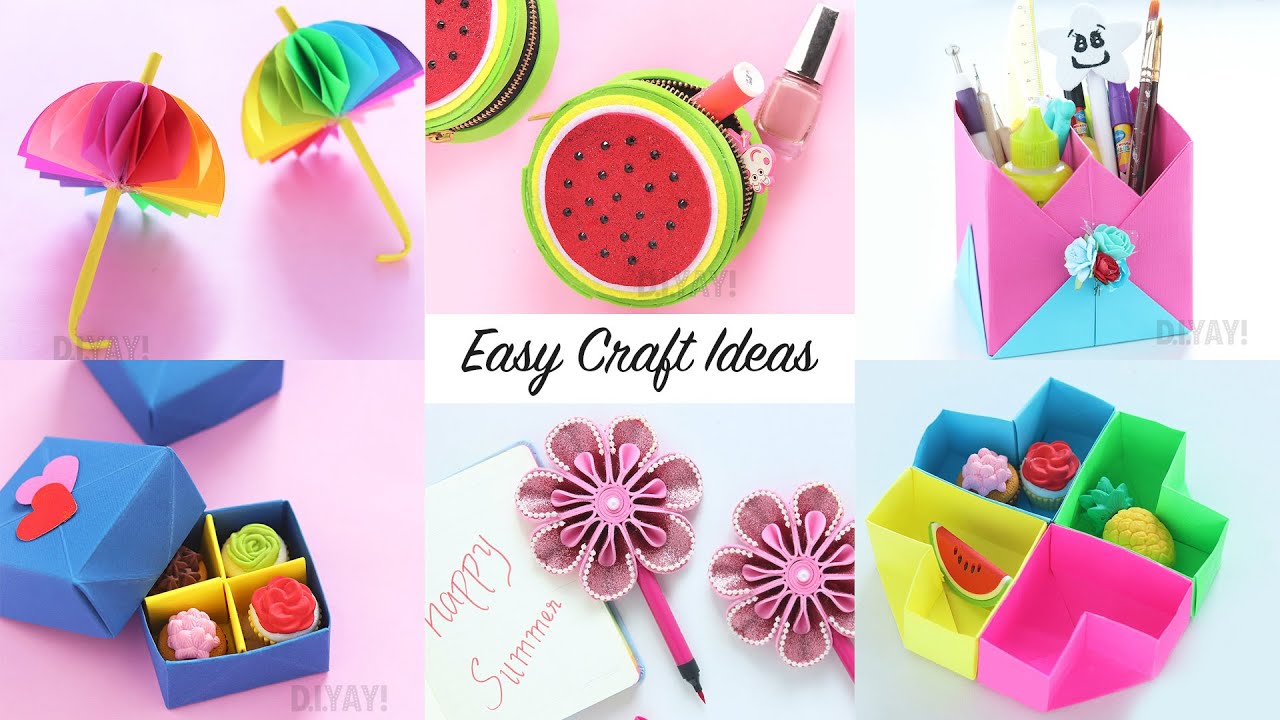
Embarking on a crafting journey can be a fulfilling and rewarding experience, allowing you to express your individuality, create beautiful objects, and learn new skills. From the simple pleasure of creating a paper flower to the satisfaction of completing a woodworking project, each craft offers a unique path to self-discovery and artistic expression. So, embrace the world of craft ideas for beginners, explore different techniques, and let your creativity soar.
Crafting for beginners can be incredibly rewarding, and a great way to start is with projects that involve natural elements. Building a DIY greenhouse is a fun and functional project that allows you to grow your own herbs and vegetables.
You can even incorporate recycled materials for a more sustainable approach, making it a truly beginner-friendly and eco-conscious craft project.

